The AI Building Course
Eleven real projects, one per screen. Pick a project, open Claude Code in an empty folder, and choose your path: take my build apart, or build your own from a roadmap.
First time in VS Code? Set up in ten minutes with How to Create Anything, then come back here.
AI Roast Generator
API keys- What an API key actually is, and why it costs money
- Why a key must never appear in code you share
- The server-side pattern that keeps it private
- What a .env file is, and why it never gets committed
You build a web page that sends a photo to Claude and prints the roast it writes back. This is the project where you learn to handle the thing every real AI app depends on, a paid API key, without ever exposing it.
Path A: take my build
The agent fetches the finished project from my GitHub, walks you through the setup, and coaches you through how it works. Fastest route to a working app.
You are coaching me through Project 01 of the AI Building Course. I am a beginner. I
have never built an app before, and I may not know what a terminal, a package or an
environment variable is. Explain things as you go, in plain English, and don't assume
I know a term just because you used it a moment ago.

We are working in the folder I have open right now. Here is the whole job.

STEP 1 - GET THE PROJECT FILES

Fetch the folder `01-AI-Roast-Generator` from this PUBLIC GitHub repository:

    https://github.com/seanmccloskey10-cell/ai-building-course

Put its CONTENTS directly into my current folder - so I end up with index.html,
app.js, package.json, package-lock.json, netlify.toml, README.md, PROMPTS.md,
STUDENT-PROMPT.md, .env.example, .gitignore and a netlify/functions/ folder sitting
right here. I should NOT end up with a nested `ai-building-course` folder or a nested
`01-AI-Roast-Generator` folder.

Use whichever method works on my machine - check what I actually have before choosing:

  - If `git` is available: clone the repo shallowly into a temporary subfolder, move
    the contents of `01-AI-Roast-Generator` into my current folder, then delete the
    temporary subfolder entirely (including its .git folder - I don't want your
    repo's git history in my project).

  - If `git` is missing: download the tarball with curl and extract it. Both `curl`
    and `tar` are built into Windows 10+ and macOS.
        https://github.com/seanmccloskey10-cell/ai-building-course/archive/refs/heads/main.tar.gz

  - If both fail, tell me exactly what failed and what you'd like me to install. Do
    not silently give up, and do not hand-write the app from memory - I want the real
    files from the repo.

If my folder already has these files (maybe I ran this prompt before), don't
re-download over the top. Tell me what's already here and move to the next step. If a
`.env` file already exists, NEVER overwrite it - it may already have my key in it.

When the files are here, read the README.md you just downloaded before continuing. It
describes the project you're about to walk me through.

STEP 2 - CHECK MY SETUP

Check that Node.js is installed and is version 20 or newer (`node --version`).

If it is missing or too old, stop and tell me to install the LTS build from
https://nodejs.org. Warn me that a new terminal TAB is not enough: VS Code and Claude
Code keep the settings they had when they launched, so I have to fully quit and reopen
them (and if it still fails after that, restart the computer). Don't try to install
Node for me and don't try to work around it - nothing else will work until that's
sorted.

On Windows, if `npm` or `npx` fails with "npm.ps1 cannot be loaded because running
scripts is disabled on this system", that is PowerShell's default script policy, not a
broken install. Tell me I can either use `cmd` instead, or run
`Set-ExecutionPolicy -Scope CurrentUser RemoteSigned` once in PowerShell and answer Y.

STEP 3 - MY API KEY (this is the only part you cannot do for me)

Explain, briefly and in plain English, what an API key is and why this project keeps
it in a file called .env instead of in the code. The one-line version: anything in
the front-end code is visible to every visitor of a live site, so the key has to stay
on the server.

Then walk me through getting one:

  1. Go to https://console.anthropic.com and sign up.
  2. Click "API keys", then "Create Key". Copy it - it is only shown once.
  3. Go to "Billing" and add a small amount of credit. A few dollars is plenty; this
     project costs pennies.

Tell me clearly that a Claude.ai subscription is NOT API credit - they are separate
products with separate billing. This trips up almost everyone: without credit the app
will build and run perfectly and then fail on the first roast.

Then STOP and wait for me to paste my key into the chat. Do not continue past this
point without it. Do not invent a key, do not use a placeholder, and do not go
looking for an existing key anywhere else on my computer - I want to do this bit
myself, because doing it once is how I learn it.

When I give you the key:
  - Create the .env file for me (this avoids a real trap: on Windows, creating files
    in File Explorer silently produces .env.txt, which looks identical and does not
    work).
  - Write it as one line: ANTHROPIC_API_KEY=<my key> with no quotes, no spaces around
    the = and no trailing whitespace or blank line after it.
  - Confirm that .gitignore already lists .env, and show me the line. Explain that
    this is what stops my key reaching GitHub.
  - Never write my key anywhere except .env. Do not echo it back to me at all -
    not in full, not truncated, not as an example of what a leaked key looks
    like. If you need to refer to it later, say "your key" or use an obvious
    fake like sk-ant-xxxxx. Do not paste it into chat, a comment, a log, a
    commit message, or any other file.

STEP 4 - INSTALL AND RUN

Run `npm install` in my folder. Warn me first that it prints a lot of text and takes
a minute or two, and that this is normal. It installs into this folder only - nothing
goes system-wide.

Then start the app with:

    npx netlify dev

Do not install the Netlify CLI globally - `npm install` already put a copy in this
folder and npx will find it.

If it asks me to log in to Netlify or link a site, tell me I can skip that - local
development works fine with no Netlify account at all.

IMPORTANT, and the single most likely thing to make me think the app is broken when it
isn't: on the FIRST run, netlify prints "Local dev server ready" BEFORE it is actually
ready. It downloads one more component in the background, and every request goes
through that component, so a roast attempted too early returns a 404 or an
"Unexpected token" error. Warn me about this BEFORE I click anything. If my first
roast fails that way, wait about 30 seconds and try again rather than changing any
code. It only happens on the very first run.

Tell me to open http://localhost:8888 and try it: pick a photo, hit the button, get
roasted. If port 8888 is busy, use `npx netlify dev --port 8899` and tell me the new
address.

If I don't have a photo to hand, make a small test image in the folder so we can prove
it works.

STEP 5 - WHEN IT BREAKS, AND MAKING IT MINE

If anything fails, read the actual error and explain what it means before changing
anything. The most common causes, in order: the first-run timing issue above; no
credit on the Anthropic account; a typo or stray quote in .env; the server not
restarted after .env changed (it only reads that file at startup); the wrong Node
version.

Once it works:
  - Show me where in netlify/functions/roast.js the comedian's personality is set,
    and get me to change it to something else. Gordon Ramsay is a good first try.
  - Show me the ONE line that would have leaked my key if I'd put the API call in
    app.js instead, and explain concretely who could have read it.
  - Point me at PROMPTS.md for the bonus challenges.

HOW I WANT YOU TO WORK

Go one step at a time and check in with me between steps rather than doing all of it
and reporting back at the end. Keep explanations short. When you run a command, say
what it does before you run it. If something doesn't match what this prompt describes
- a missing file, a different error, an unexpected version - tell me plainly instead
of improvising around it.
Path B: build your own
A rough roadmap, not a recipe. Your agent coaches, you think. You'll hit the same walls I did, on purpose, with a warning before each one.
I want to build my own AI Roast Generator from scratch: a web page where I
upload a photo and an AI roasts it. Coach me through building it, but let me
do the thinking. Here is the rough roadmap - we fill in the details together:

1. A simple page: a photo picker, a button, and somewhere for the roast to
   appear.
2. An AI call that can SEE the image. I'll use the Anthropic API
   (claude-haiku-4-5 is the cheap vision-capable model).
3. THE PART THAT MATTERS: the API key must never appear in the browser code,
   because anything in front-end code is visible to every visitor. So the AI
   call lives in a small server-side function (Netlify functions work), and
   the browser talks to MY function - never to Anthropic directly.
4. The key lives in a file called .env, which is never shared and never
   committed.

Things I know are coming - warn me at the right moment instead of letting me
hit them cold:
  - I need my own API key from https://console.anthropic.com with a few
    dollars of credit. A Claude subscription is NOT API credit.
  - Images need converting to base64, and Anthropic wants the media type
    sent as a separate field.
  - .env is only read when the server starts, so restart after changing it.

Don't write the whole thing for me in one go. Go piece by piece, explain
what each part does, and make me predict what should happen before we run
anything. If I'm stuck after two honest attempts, show me the fix and
explain why it works.

If we get truly stuck, the finished version lives at
https://github.com/seanmccloskey10-cell/ai-building-course (project 01) -
for comparing at the end, not copying during.
Wordle Clone
Optional warm-up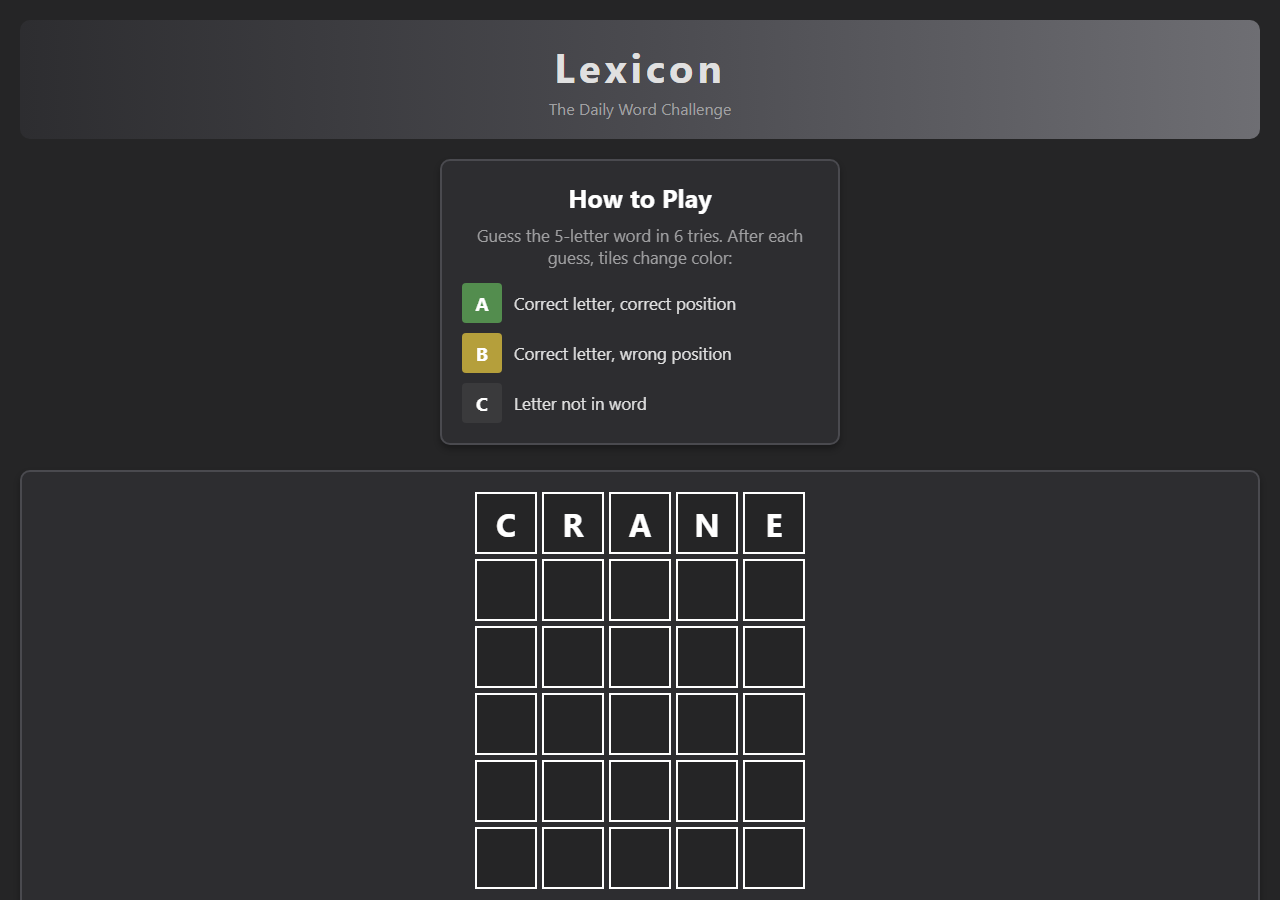
- How to turn the rules of a game into code
- State: what the app has to remember between clicks
- Why checking a guess is harder than it looks (repeated letters)
- Win and lose conditions, and restarting cleanly
You rebuild Wordle. No AI, no keys, no server: just you discovering that "the rules of a game" and "code that enforces them" are the same thing written twice. The repeated-letter edge case will humble you exactly once, and then you'll understand state.
Path A: take my build
You are coaching me through Project 02 of the AI Building Course, a Wordle-style word
game. I am a beginner. I may not know what a terminal, a package or a variable is.
Explain things as you go, in plain English, and don't assume I know a term just because
you used it a moment ago.

This project has NO API key and NO account - nothing to sign up for, nothing that can
cost me money. We are working in the folder I have open right now. Here is the whole job.

STEP 1 - GET THE PROJECT FILES

Fetch the folder `02-Wordle-Clone` from this PUBLIC GitHub repository:

    https://github.com/seanmccloskey10-cell/ai-building-course

Put its CONTENTS directly into my current folder - so I end up with index.html, app.js,
styles.css, package.json, package-lock.json, README.md, PROMPTS.md, STUDENT-PROMPT.md and
.gitignore sitting right here. I should NOT end up with a nested `ai-building-course`
folder or a nested `02-Wordle-Clone` folder.

Use whichever method works on my machine - check what I actually have before choosing:

  - If `git` is available: clone the repo shallowly into a temporary subfolder, move the
    contents of `02-Wordle-Clone` into my current folder, then delete the temporary
    subfolder entirely (including its .git folder - I don't want your repo's git history
    in my project).

  - If `git` is missing: download the tarball with curl and extract it. Both `curl` and
    `tar` are built into Windows 10+ and macOS.
        https://github.com/seanmccloskey10-cell/ai-building-course/archive/refs/heads/main.tar.gz

  - If both fail, tell me exactly what failed and what you'd like me to install. Do not
    silently give up, and do not hand-write the game from memory - I want the real files
    from the repo.

If my folder already has these files (maybe I ran this before), don't re-download over
the top. Tell me what's already here and move on.

When the files are here, read the README.md you just downloaded before continuing.

STEP 2 - CHECK MY SETUP

Check that Node.js is installed and is version 20 or newer (`node --version`).

If it is missing or too old, stop and tell me to install the LTS build from
https://nodejs.org. Warn me that a new terminal TAB is not enough: VS Code and Claude
Code keep the settings they had when they launched, so I have to fully quit and reopen
them (and if it still fails after that, restart the computer). Don't try to install Node
for me and don't try to work around it.

On Windows, if `npm` or `npx` fails with "npm.ps1 cannot be loaded because running
scripts is disabled on this system", that is PowerShell's default script policy, not a
broken install. Tell me I can either use `cmd` instead, or run
`Set-ExecutionPolicy -Scope CurrentUser RemoteSigned` once in PowerShell and answer Y.

STEP 3 - THE CONCEPT (this is what Project 02 is really about)

Before we run anything, explain what this project teaches, in plain English: a game is
just a set of rules written down as code, plus a little bit of hidden "state" the program
remembers as I play.

Point me at three things in the code I just downloaded, and explain each in one or two
sentences:
  - The secret word: in `app.js`, `secretWord` is picked at random and kept in a variable.
    Everything else is comparing my guesses to it.
  - The state: the variables `currentRow`, `currentTile`, `gameOver` and `guesses` at the
    top of `app.js`. Every keypress changes one of them.
  - The clever bit: the `getColors` function, which decides green/yellow/grey for each
    tile. Tell me it works in TWO passes (greens first, then yellows) and ask me to guess
    why - the answer is repeated letters, and it's worth me actually thinking about before
    you tell me.

Keep this short - a few sentences each, not a lecture. The point is that I look at real
code and see it isn't magic.

STEP 4 - RUN IT

Run `npm install` in my folder. Warn me first that it prints a lot of text and takes a
minute or two, and that this is normal. It installs into this folder only. It will end
with some "vulnerability" warnings, possibly in red - tell me those are harmless noise
from inside the Netlify tool and NOT to run `npm audit fix --force`.

Then start it with:

    npx netlify dev

Do not install the Netlify CLI globally - `npm install` already put a copy in this folder.
If it asks me to log in to Netlify or link a site, tell me I can skip that.

IMPORTANT, so I don't think it's broken when it isn't: on the FIRST run, netlify prints
"Local dev server ready" BEFORE it is truly ready - it sets one more thing up in the
background. If the page is blank or odd for a few seconds, warn me to wait up to 30
seconds and refresh rather than changing anything. It only happens on the very first run.

Tell me to open http://localhost:8888 and play a round: type a 5-letter word, press Enter,
watch the tiles colour. If port 8888 is busy, use `npx netlify dev --port 8899` and tell
me the new address.

STEP 5 - MAKE IT MINE

Once it works:
  - Show me the `VALID_WORDS` list at the top of `app.js` and get me to add a word to it
    (a real 5-letter word). Explain that it's both the answers and the allowed guesses,
    so my new word can now come up.
  - Walk me through ONE run of `getColors` with a specific guess and secret word, so I can
    see the two-pass colouring actually happen.
  - Point me at PROMPTS.md for the bonus challenges.

HOW I WANT YOU TO WORK

Go one step at a time and check in with me between steps. Keep explanations short. When
you run a command, say what it does before you run it. If something doesn't match what
this prompt describes, tell me plainly instead of improvising around it.
Path B: build your own
I want to build my own Wordle clone from scratch. Coach me through it, but
let me do the thinking. The rough roadmap - we fill in the details together:

1. A 6x5 grid of tiles and a way to type letters into the current row.
2. A secret five-letter word. Hardcode one to start - we can add a word
   list later.
3. THE PART THAT MATTERS: checking a guess. Green = right letter, right
   spot. Yellow = in the word, wrong spot. Grey = not in the word. Sounds
   easy. It isn't.
4. Win when the word is guessed, lose after six rows, and a clean way to
   play again.

Things I know are coming - warn me at the right moment instead of letting
me hit them cold:
  - Repeated letters break naive colouring (guess SPEED against ERASE and
    think about what the two E's should show). Make me reason through it
    before you show me the standard two-pass fix.
  - Never log or print the secret word, even for debugging - it ends up
    shipped.
  - Keyboard input needs Backspace and Enter handled, not just letters.

Go piece by piece, explain what each part does, and make me predict what
should happen before we run anything. If I'm stuck after two honest
attempts, show me the fix and explain why it works.

If we get truly stuck, the finished version lives at
https://github.com/seanmccloskey10-cell/ai-building-course (project 02) -
for comparing at the end, not copying during.
Personal Portfolio
Netlify · deploy a website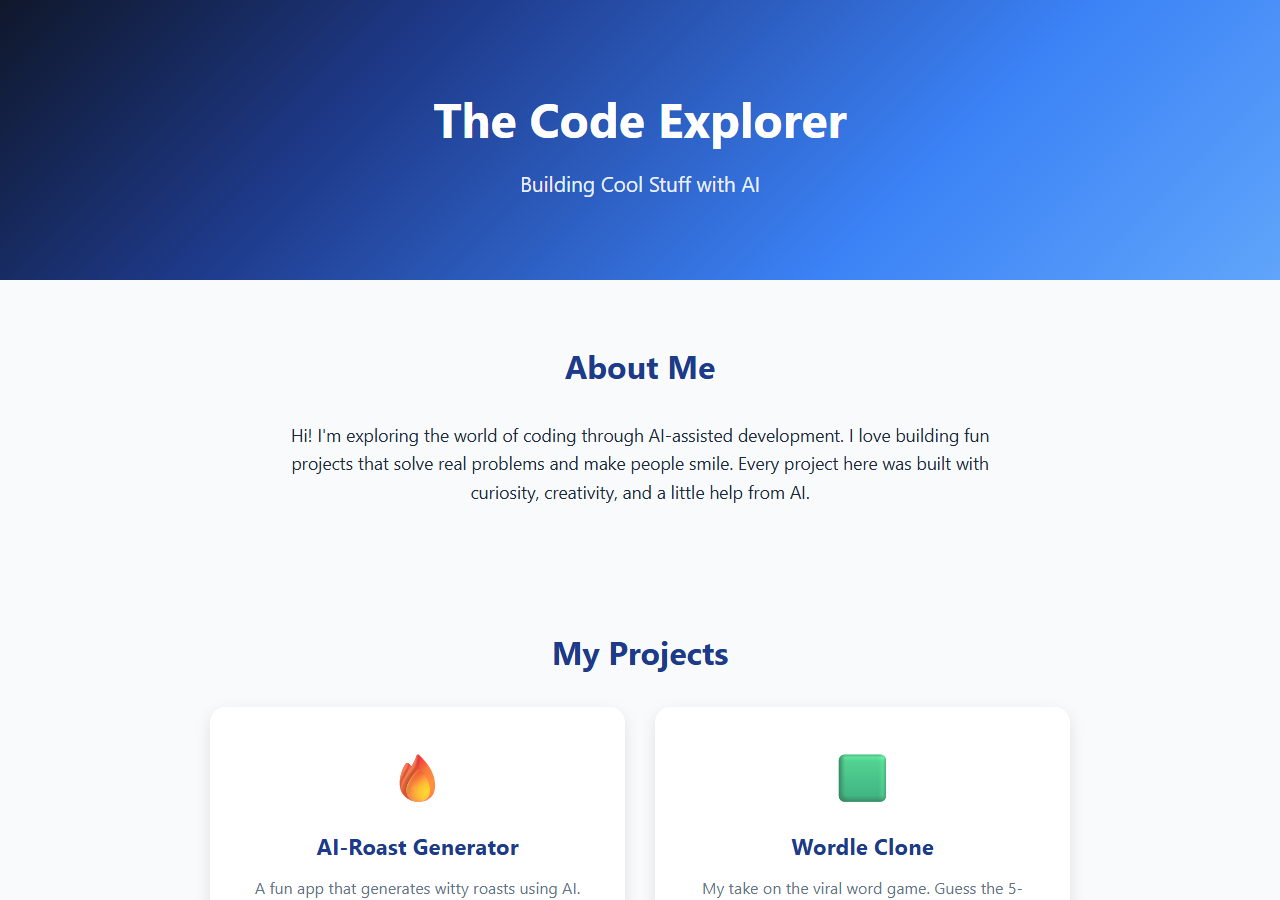
- What a deploy actually is: a folder on your laptop becoming a URL
- Netlify's drag-and-drop deploy, the gentlest on-ramp there is
- What changes when you connect a git repo instead
- Why "it works on my machine" stops being a joke today
You build a one-page portfolio and put it on the actual internet with Netlify. The site is the excuse; the lesson is the deploy. Once you've done folder-to-URL a single time, every project you ever build becomes shareable.
Path A: take my build
You are coaching me through Project 03 of the AI Building Course, a personal portfolio
website that I am going to DEPLOY to the real internet. I am a beginner. I may not know
what a terminal, a package, or "deploying" means. Explain things as you go, in plain
English, and don't assume I know a term just because you used it a moment ago.

This project has NO API key and costs nothing. The one new thing it teaches is deploying:
putting my site on the internet with a public web address. We are working in the folder I
have open right now. Here is the whole job.

STEP 1 - GET THE PROJECT FILES

Fetch the folder `03-Portfolio-Website` from this PUBLIC GitHub repository:

    https://github.com/seanmccloskey10-cell/ai-building-course

Put its CONTENTS directly into my current folder - so I end up with index.html, script.js,
styles.css, package.json, package-lock.json, README.md, PROMPTS.md, STUDENT-PROMPT.md and
.gitignore sitting right here. I should NOT end up with a nested `ai-building-course`
folder or a nested `03-Portfolio-Website` folder.

Use whichever method works on my machine - check what I actually have before choosing:

  - If `git` is available: clone the repo shallowly into a temporary subfolder, move the
    contents of `03-Portfolio-Website` into my current folder, then delete the temporary
    subfolder entirely (including its .git folder).

  - If `git` is missing: download the tarball with curl and extract it. Both `curl` and
    `tar` are built into Windows 10+ and macOS.
        https://github.com/seanmccloskey10-cell/ai-building-course/archive/refs/heads/main.tar.gz

  - If both fail, tell me exactly what failed and what you'd like me to install. Do not
    silently give up, and do not hand-write the site from memory - I want the real files.

If my folder already has these files, don't re-download over the top. Tell me what's here
and move on.

When the files are here, read the README.md you just downloaded before continuing.

STEP 2 - CHECK MY SETUP

Check that Node.js is installed and is version 20 or newer (`node --version`).

If it is missing or too old, stop and tell me to install the LTS build from
https://nodejs.org. Warn me that a new terminal TAB is not enough: VS Code and Claude
Code keep the settings they had when they launched, so I have to fully quit and reopen
them (and if it still fails after that, restart the computer). Don't try to install Node
for me and don't try to work around it.

On Windows, if `npm` or `npx` fails with "npm.ps1 cannot be loaded because running
scripts is disabled on this system", that is PowerShell's default script policy. Tell me I
can either use `cmd` instead, or run `Set-ExecutionPolicy -Scope CurrentUser RemoteSigned`
once in PowerShell and answer Y.

STEP 3 - RUN IT LOCALLY (the private rehearsal)

Run `npm install` (warn me it prints a lot and takes a minute; the vulnerability warnings
at the end are harmless noise - do NOT run `npm audit fix --force`).

Then `npx netlify dev`. It serves the site at http://localhost:8888. If it offers to log
me in to Netlify, tell me to skip it - I don't need an account just to preview.

Warn me about the first-run timing: netlify prints "ready" a few seconds before it truly
is, so if the page is blank, wait up to 30 seconds and refresh. Only happens once.

Have me open the site and look at it. Then explain, in one or two sentences, that this
`localhost` address only works on MY computer - which is exactly why the next step matters.

STEP 4 - THE CONCEPT + DEPLOY (this is what Project 03 is about)

Explain the concept in plain English before we do it: `localhost` means "this computer
only". Deploying copies my files onto a server that's always online and gives them a
public web address, so anyone with the link can open my site. That's the difference
between a project and a published project.

Then coach me through deploying with Netlify Drop, which is the simplest way:

  1. Tell me to go to https://app.netlify.com/drop in my browser.
  2. Tell me to drag my project FOLDER onto that page - but WARN me first not to include
     the `node_modules` folder (it's huge and unnecessary for a plain HTML site, and
     Netlify Drop works best under 50MB). The cleanest approach: tell me to drag just the
     three files - index.html, styles.css, script.js - or a copy of the folder with
     node_modules deleted.
  3. Tell me Netlify will give me a live URL in a few seconds, and that to keep/manage the
     site I can sign up for a free account (no card).

IMPORTANT: the drag-and-drop is something I do myself in my browser - you cannot do it for
me, and you should NOT try to deploy on my behalf, log into Netlify, or use any Netlify
account. Your job is to explain each step and tell me what I should see. Wait for me to
tell you it worked and paste my live URL.

If I would rather use the command line, the alternative is `npx netlify deploy` then
`npx netlify deploy --prod` from the project folder (it opens a browser to log me in) -
but Netlify Drop is the easier first deploy, so steer me there unless I ask.

STEP 5 - MAKE IT MINE

Once my site is live:
  - Congratulate me - I have a real website on the internet.
  - Help me replace the placeholder content in index.html with my real name, about-me,
    projects (including the roast generator and Wordle from earlier), and real GitHub /
    LinkedIn links.
  - Explain how to redeploy: drag the folder again, or `npx netlify deploy --prod`.
  - Point me at PROMPTS.md for more.

HOW I WANT YOU TO WORK

Go one step at a time and check in with me between steps. Keep explanations short. When
you run a command, say what it does before you run it. Never deploy on my behalf or touch
a Netlify account - deploying is the thing I'm here to learn to do myself. If something
doesn't match what this prompt describes, tell me plainly instead of improvising.
Path B: build your own
I want to build my own portfolio site from scratch and put it live on the
internet. Coach me through it, but let me do the thinking. The rough
roadmap - we fill in the details together:

1. One index.html with sections: who I am, three things I've built (or
   want to build), how to contact me. One CSS file. No frameworks.
2. Make it not look like 1998: one font, two colours, whitespace.
3. THE PART THAT MATTERS: deploying. We use Netlify's drag-and-drop
   (app.netlify.com/drop) - the whole folder becomes a live URL in under
   a minute, no account gymnastics.
4. Then change something, re-deploy, and watch the live site update.

Things I know are coming - warn me at the right moment instead of letting
me hit them cold:
  - The free site name is random; I can change it in Site settings.
  - If the live site doesn't show my change, it's usually a stale browser
    cache - hard refresh before touching any code.
  - Everything I deploy is PUBLIC. Read the folder once before dragging it
    in - no notes-to-self, no drafts, nothing personal.

Go piece by piece and make me predict what should happen before we run
anything. If I'm stuck after two honest attempts, show me the fix and
explain why it works.

If we get truly stuck, the finished version lives at
https://github.com/seanmccloskey10-cell/ai-building-course (project 03) -
for comparing at the end, not copying during.
Crypto Dashboard
Live data · crypto prices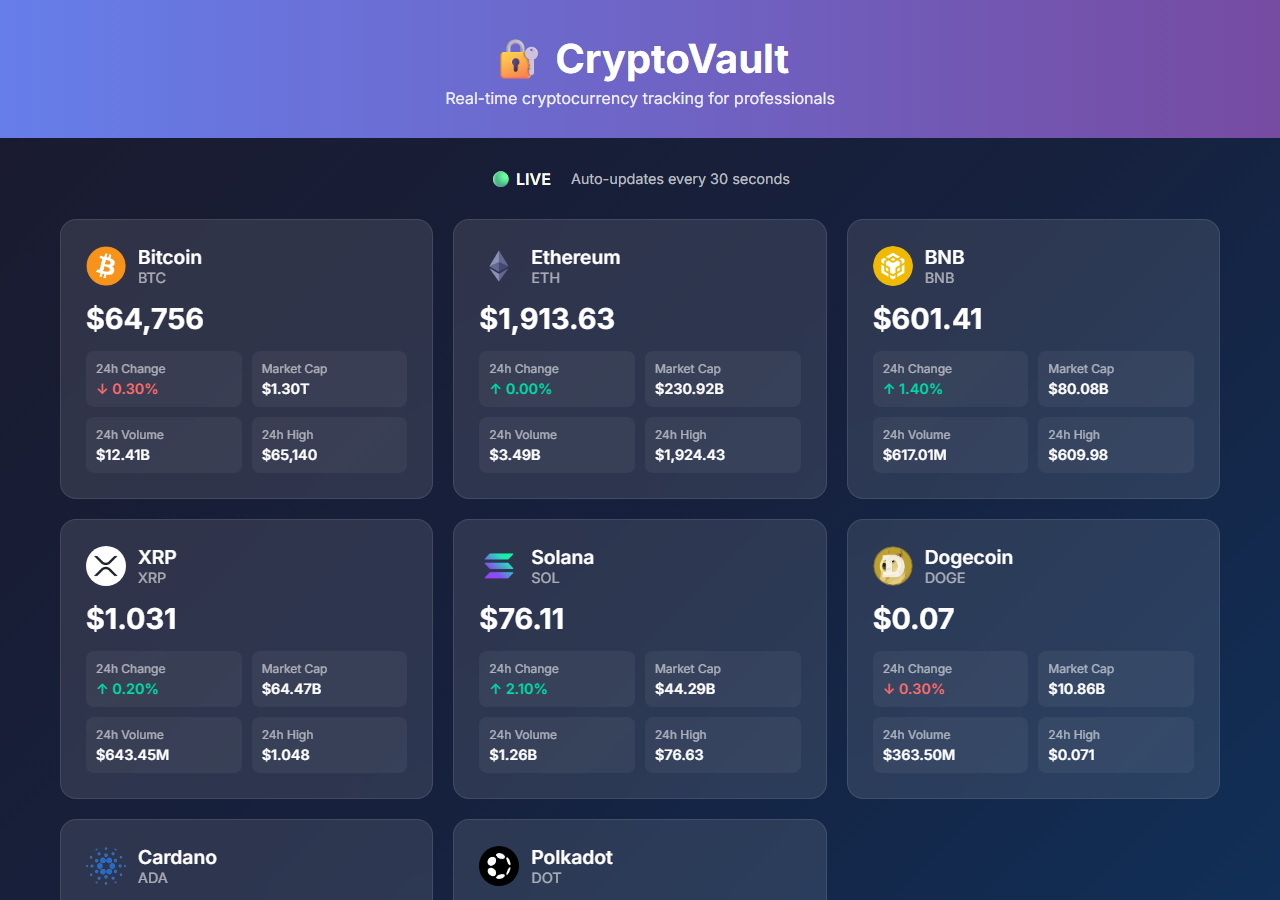
- Fetching live data from an API with no key at all
- What JSON is, and how to read it without fear
- Why some APIs are free and open when Project 01's needed a key
- Rate limits: what they are and how not to hit them
You build a dashboard showing live crypto prices from CoinGecko's public API. It's the deliberate opposite of Project 01: no key, no server, no .env, because this API is open. Understanding WHY it can be open teaches you more about keys than the keys did.
Path A: take my build
You are coaching me through Project 04 of the AI Building Course, a live cryptocurrency
price dashboard. I am a beginner. I may not know what a terminal, a package, an API, or a
variable is. Explain things as you go, in plain English, and don't assume I know a term
just because you used it a moment ago.

This project has NO API key and NO account - and that is the whole point of it. We are
working in the folder I have open right now. Here is the whole job.

STEP 1 - GET THE PROJECT FILES

Fetch the folder `04-Crypto-Dashboard` from this PUBLIC GitHub repository:

    https://github.com/seanmccloskey10-cell/ai-building-course

Put its CONTENTS directly into my current folder - so I end up with index.html, script.js,
styles.css, package.json, package-lock.json, README.md, PROMPTS.md, STUDENT-PROMPT.md and
.gitignore sitting right here. I should NOT end up with a nested `ai-building-course`
folder or a nested `04-Crypto-Dashboard` folder.

Use whichever method works on my machine - check what I actually have before choosing:

  - If `git` is available: clone the repo shallowly into a temporary subfolder, move the
    contents of `04-Crypto-Dashboard` into my current folder, then delete the temporary
    subfolder entirely (including its .git folder).

  - If `git` is missing: download the tarball with curl and extract it. Both `curl` and
    `tar` are built into Windows 10+ and macOS.
        https://github.com/seanmccloskey10-cell/ai-building-course/archive/refs/heads/main.tar.gz

  - If both fail, tell me exactly what failed. Do not hand-write the app from memory - I
    want the real files.

If my folder already has these files, don't re-download. Tell me what's here and move on.

When the files are here, read the README.md you just downloaded before continuing.

STEP 2 - CHECK MY SETUP

Check that Node.js is installed and is version 20 or newer (`node --version`).

If it is missing or too old, stop and tell me to install the LTS build from
https://nodejs.org. Warn me that a new terminal TAB is not enough: VS Code and Claude
Code keep the settings they had when they launched, so I have to fully quit and reopen
them (and if it still fails after that, restart the computer). Don't try to install Node
for me and don't try to work around it.

On Windows, if `npm` or `npx` fails with "npm.ps1 cannot be loaded because running
scripts is disabled on this system", that is PowerShell's default script policy, not a
broken install. Tell me I can either use `cmd` instead, or run
`Set-ExecutionPolicy -Scope CurrentUser RemoteSigned` once in PowerShell and answer Y.

STEP 3 - THE CONCEPT (this is what Project 04 is really about)

Before we run anything, explain the big idea, because this project is the deliberate
OPPOSITE of Project 01:

  - An API is one program asking another for something. Project 01 asked an AI to write a
    roast, and that cost money, so it needed a secret key - which had to be hidden on a
    server so visitors couldn't steal it.
  - THIS project asks CoinGecko for crypto prices. That is free and public - no key, no
    account, no secret. And here's the key insight: because there is no secret to protect,
    the code can call the API straight from the browser. There is no server-side function
    in this project at all. Same idea (call an API), opposite architecture. The deciding
    question is always: is there a secret?
  - The one catch: a free public API limits how OFTEN it answers (a "rate limit"). Ask too
    fast and it returns HTTP 429, which means "slow down", not "broken". Point me at the
    error-handling in script.js and tell me that's what most of the code is actually for.

Keep this short - a few sentences each. The point is that I understand WHY 01 and 04 are
built so differently.

STEP 4 - RUN IT

Run `npm install` (warn me it prints a lot and takes a minute; the vulnerability warnings
at the end are harmless noise - do NOT run `npm audit fix --force`).

Then `npx netlify dev`. It serves the dashboard at http://localhost:8888. If it offers to
log me in to Netlify, tell me I can skip it. Reassure me that netlify printing "No app
server detected / using simple static server / unable to determine public folder" is
normal for a plain static site. And warn me about the first-run timing: it prints "ready"
a few seconds early, so if the page is blank, wait up to 30 seconds and refresh.

Tell me to open http://localhost:8888 and watch the prices load. Then have me open the
browser's DevTools console (F12 on Windows, Cmd+Option+I on Mac) and look at the "API
Response" the code prints - that's the real live data. If port 8888 is busy, use
`npx netlify dev --port 8899`.

If the prices don't appear and a "data's busy, wait a minute" message shows instead, tell
me that's the rate limit, not a bug - especially likely on shared wifi - and it'll fill in
on its own.

STEP 5 - MAKE IT MINE

Once it works:
  - Show me the `API_URL` line at the top of script.js and get me to change the list of
    coins (the `ids=` part) - swap one out or add one like `litecoin`.
  - Walk me through the error-handling in script.js and explain what each case (429, other
    errors, no internet) does, so I see that "handle the failure" is real work.
  - Point me at PROMPTS.md for the bonus challenges.

HOW I WANT YOU TO WORK

Go one step at a time and check in with me between steps. Keep explanations short. When
you run a command, say what it does before you run it. If something doesn't match what
this prompt describes, tell me plainly instead of improvising around it.
Path B: build your own
I want to build my own crypto price dashboard from scratch using a public
API that needs no key. Coach me through it, but let me do the thinking.
The rough roadmap - we fill in the details together:

1. A page with cards for a handful of coins: name, price, 24h change.
2. Fetch live prices from CoinGecko's public API (their simple/price
   endpoint needs no key at all).
3. THE PART THAT MATTERS: handling what comes back. Read the JSON with me
   the first time so I actually understand its shape before we write any
   code against it.
4. A refresh button, and colour the 24h change green or red.

Things I know are coming - warn me at the right moment instead of letting
me hit them cold:
  - The free API has a shared rate limit (roughly 5-15 calls a minute).
    A failed request usually means "wait a minute", not "broken code" -
    build the error message to say so.
  - No auto-refresh loops - that's how you hit the limit instantly.
  - fetch() can fail for boring reasons (offline, timeout). Handle it;
    an empty dashboard with no explanation is the mark of an amateur.
  - Why does this need no key when Project 01 did? Make me answer that
    before we finish.

Go piece by piece and make me predict what should happen before we run
anything. If I'm stuck after two honest attempts, show me the fix.

If we get truly stuck, the finished version lives at
https://github.com/seanmccloskey10-cell/ai-building-course (project 04) -
for comparing at the end, not copying during.
Habit Streak Tracker
Local storage- Saving data in the browser so a refresh doesn't wipe it
- localStorage versus a real database: what it is and isn't
- JSON.stringify and JSON.parse: why storage only speaks text
- Designing so a misclick can never destroy history
You build a habit tracker whose data survives closing the tab: tick habits, grow streaks, no database anywhere. The quiet lesson is data care: the difference between an app that stores things and an app that can't lose them by accident.
Path A: take my build
You are coaching me through Project 05 of the AI Building Course, a habit streak tracker.
I am a beginner. I may not know what a terminal, a package, or a variable is. Explain
things as you go, in plain English, and don't assume I know a term just because you used
it a moment ago.

This project has NO API key and NO account - nothing to sign up for. Its whole point is
localStorage: saving data in the browser so it survives a refresh. We are working in the
folder I have open right now. Here is the whole job.

STEP 1 - GET THE PROJECT FILES

Fetch the folder `05-Habit-Tracker` from this PUBLIC GitHub repository:

    https://github.com/seanmccloskey10-cell/ai-building-course

Put its CONTENTS directly into my current folder - so I end up with index.html, app.js,
styles.css, package.json, package-lock.json, README.md, PROMPTS.md, STUDENT-PROMPT.md and
.gitignore sitting right here. I should NOT end up with a nested folder.

Use whichever method works on my machine:
  - If `git` is available: clone shallowly into a temp subfolder, move the contents of
    `05-Habit-Tracker` up, then delete the temp subfolder (including its .git).
  - If `git` is missing: download and extract the tarball with curl/tar.
        https://github.com/seanmccloskey10-cell/ai-building-course/archive/refs/heads/main.tar.gz
  - If both fail, tell me exactly what failed. Do not hand-write the app from memory.

If my folder already has these files, don't re-download. Then read the README.md.

STEP 2 - CHECK MY SETUP

Check Node.js is version 20 or newer (`node --version`). If missing/old, tell me to install
LTS from nodejs.org and fully quit+reopen VS Code / Claude Code (a new tab isn't enough).
On Windows, if npm/npx fails with "npm.ps1 cannot be loaded because running scripts is
disabled", tell me to use `cmd` or run `Set-ExecutionPolicy -Scope CurrentUser RemoteSigned`.

STEP 3 - THE CONCEPT (this is what Project 05 is really about)

Explain the big idea in plain English: every browser has a small built-in store called
localStorage. My code can save text into it, and it's STILL THERE after I refresh or close
and reopen the browser - which is why my streaks won't vanish like everything did in the
earlier projects.

Then explain the honest limitation, because it's the real lesson: localStorage is NOT a
database. A database lives on a server and shows the same data on every device I log in
from. localStorage lives only in THIS browser on THIS computer - open the app on my phone
and it's blank. It's a private notebook, not a shared filing cabinet. That difference -
knowing which one a project needs - is the point.

Keep it short. Offer to show me the data live later (DevTools -> Application -> Local
Storage).

STEP 4 - RUN IT

Run `npm install` (warn it's noisy; the vulnerability warnings are harmless; do NOT run
`npm audit fix --force`). Then `npx netlify dev`. Skip any Netlify login. Reassure me that
"No app server detected / simple static server / unable to determine public folder" is
normal for a static site. Warn about first-run timing (ready a few seconds early; wait 30s
and refresh if blank).

Tell me to open http://localhost:8888, pick a couple of habits, tick some days - then
REFRESH THE PAGE and see that everything's still there. That's localStorage working. If
port 8888 is busy, use `npx netlify dev --port 8899`.

STEP 5 - MAKE IT MINE

Once it works:
  - Show me the `HABITS` array at the top of app.js and get me to change it to habits I
    actually care about.
  - Open DevTools -> Application -> Local Storage and show me my data sitting there as
    plain text under the `habitTrackerData` key - so I can SEE what "saved in the browser"
    really means.
  - Point out that un-selecting a habit and re-selecting it keeps its history (only the
    Reset button erases things) - and why "never silently destroy the user's data" is a
    rule that matters.
  - Point me at PROMPTS.md for the bonus challenges.

HOW I WANT YOU TO WORK

Go one step at a time and check in with me between steps. Keep explanations short. When
you run a command, say what it does before you run it. If something doesn't match what
this prompt describes, tell me plainly instead of improvising around it.
Path B: build your own
I want to build my own habit streak tracker from scratch that remembers
everything without a database. Coach me through it, but let me do the
thinking. The rough roadmap - we fill in the details together:

1. Add a habit, see my habits as a list, delete one I've given up on.
2. Tick a habit for today; show the streak (consecutive days).
3. THE PART THAT MATTERS: persistence. localStorage keeps it all in the
   browser - explain what it actually is, and what it is NOT (a database),
   before we use it.
4. A simple last-7-days view per habit.

Things I know are coming - warn me at the right moment instead of letting
me hit them cold:
  - localStorage only stores strings - JSON.stringify going in,
    JSON.parse coming out, and a plan for when parsing fails.
  - Decide what un-ticking today should do BEFORE we write it. It must
    never delete history - make me design the data shape so a misclick
    can't destroy weeks of streaks.
  - Timezones bite streak logic. Use local dates consistently and make me
    test "what happens just after midnight".
  - Clearing browser data wipes everything - the app should be honest
    about that somewhere.

Go piece by piece and make me predict what should happen before we run
anything. If I'm stuck after two honest attempts, show me the fix.

If we get truly stuck, the finished version lives at
https://github.com/seanmccloskey10-cell/ai-building-course (project 05) -
for comparing at the end, not copying during.
Buy Me a Coffee
Stripe · accept payments- Taking an actual payment with Stripe Payment Links
- The redirect flow: your page, Stripe's checkout, your success page
- Why card details never touch your code, by design
- Test mode: practising with pretend money
You build a buy-me-a-coffee page that takes a real payment through Stripe. The trick is what you don't build: Stripe hosts the checkout, holds the card data, carries the liability. Your job is a link and two pages.
Path A: take my build
You are coaching me through Project 06 of the AI Building Course, a "Buy Me a Coffee" page
that takes a real payment with Stripe. I am a beginner. I may not know what a terminal, a
package, or an API is. Explain things as you go, in plain English, and don't assume I know
a term just because you used it a moment ago.

This project needs NO API key and NO card-handling code - Stripe does all of that. The one
thing I do myself is create a Stripe Payment Link and paste it in. We are working in the
folder I have open right now. Here is the whole job.

STEP 1 - GET THE PROJECT FILES

Fetch the folder `06-Buy-Me-A-Coffee` from this PUBLIC GitHub repository:

    https://github.com/seanmccloskey10-cell/ai-building-course

Put its CONTENTS directly into my current folder - so I end up with index.html,
thank-you.html, styles.css, package.json, package-lock.json, README.md, PROMPTS.md,
STUDENT-PROMPT.md and .gitignore sitting right here. I should NOT end up with a nested
folder.

Use whichever method works on my machine:
  - If `git` is available: clone shallowly into a temp subfolder, move the contents of
    `06-Buy-Me-A-Coffee` up, then delete the temp subfolder (including its .git).
  - If `git` is missing: download and extract the tarball with curl/tar.
        https://github.com/seanmccloskey10-cell/ai-building-course/archive/refs/heads/main.tar.gz
  - If both fail, tell me exactly what failed. Do not hand-write the app from memory.

If my folder already has these files, don't re-download. Then read the README.md.

STEP 2 - CHECK MY SETUP

Check Node.js is version 20 or newer (`node --version`). If missing/old, tell me to install
LTS from nodejs.org and fully quit+reopen VS Code / Claude Code (a new tab isn't enough).
On Windows, if npm/npx fails with "npm.ps1 cannot be loaded because running scripts is
disabled", tell me to use `cmd` or run `Set-ExecutionPolicy -Scope CurrentUser RemoteSigned`.

STEP 3 - THE CONCEPT (this is what Project 06 is really about)

Explain the big idea in plain English before we wire anything up: taking a card payment
sounds dangerous, but I never actually handle the card. A Stripe Payment Link sends the
customer to a checkout page on STRIPE's servers; they enter their card there, Stripe
processes it and carries all the risk, and the money arrives in my account. So my site
needs no secret key and no card-handling code - it's just a link.

Contrast it with earlier projects to make it land: Project 01 hid a secret key I owned on a
server; this is the opposite - a card number is a secret I should NEVER hold, so I hand the
whole job to Stripe and touch nothing. Keep it short.

STEP 4 - RUN IT

Run `npm install` (warn it's noisy; harmless vulnerability warnings; do NOT run
`npm audit fix --force`). Then `npx netlify dev`. Skip any Netlify login. Reassure me the
"No app server detected / simple static server" notices are normal. Open http://localhost:8888
and note the button doesn't go anywhere yet - that's the next step.

STEP 5 - MAKE THE PAYMENT BUTTON WORK (the actual lesson)

Coach me through this - I do the Stripe parts myself in my browser; do NOT create a Stripe
account or a link for me:
  1. Make a free Stripe account at dashboard.stripe.com/register. Tell me I land in TEST
     mode automatically - a free sandbox, no bank details needed.
  2. Create a Payment Link: dashboard.stripe.com/payment-links -> "+ New" -> "+ Add a new
     product" (name it "Coffee", set a price) -> "Create link". Stripe gives me a URL like
     https://buy.stripe.com/test_...
  3. Have me paste that URL into index.html, replacing PASTE_YOUR_STRIPE_PAYMENT_LINK_HERE.
     Then refresh and click the button - it should go to Stripe's checkout.
  4. Tell me to pay with the test card 4242 4242 4242 4242, any future expiry, any 3-digit
     CVC - it succeeds with no real money.
  5. Optional level-up: in the Payment Link's "After payment" setting I can redirect people
     to my thank-you.html after they pay. Explain it, but note it's easiest once the site
     is deployed (Project 03). Don't block on it.

Warn me clearly: everything here is TEST mode (free, fake). Taking real money means
switching the dashboard to LIVE mode and needs real bank details - which I should NOT do
just to learn.

Point me at PROMPTS.md for ways to make it mine.

HOW I WANT YOU TO WORK

Go one step at a time and check in with me between steps. Keep explanations short. When
you run a command, say what it does before you run it. Never create a Stripe account or a
Payment Link on my behalf - making the link is the thing I'm here to learn. If something
doesn't match what this prompt describes, tell me plainly instead of improvising.
Path B: build your own
I want to build my own buy-me-a-coffee page from scratch that takes real
payments through Stripe. Coach me through it, but let me do the thinking.
The rough roadmap - we fill in the details together:

1. A simple page: who I am, what a coffee costs, one big button.
2. A Stripe Payment Link behind that button. This gets created in Stripe's
   dashboard, not in code - walk me through where, in TEST MODE.
3. THE PART THAT MATTERS: the redirect flow. My page hands the visitor to
   Stripe's hosted checkout; Stripe hands them back to my success page.
   Draw me the arrows before we build the pages.
4. A success page and a cancel page, and setting the Payment Link to
   redirect to them.

Things I know are coming - warn me at the right moment instead of letting
me hit them cold:
  - TEST MODE everywhere until the very end. Stripe's test card is
    4242 4242 4242 4242. Never type a real card while building.
  - I never handle card numbers. If any design we sketch involves card
    details touching my page, stop me - that's the whole point.
  - The success page should not claim to verify payment (it can't, without
    a server) - it says thank you honestly.

Go piece by piece and make me predict what should happen before we run
anything. If I'm stuck after two honest attempts, show me the fix.

If we get truly stuck, the finished version lives at
https://github.com/seanmccloskey10-cell/ai-building-course (project 06) -
for comparing at the end, not copying during.
Dear Diary
Supabase · a backend- A real hosted database (Supabase) instead of the browser
- Sign-in with magic links: auth without passwords
- Row-level security: the rule that makes YOUR rows yours
- Which keys are safe in the browser and which never are
You build a private diary on a real database with real sign-in. The star is RLS, row-level security: a database-level wall that means user A physically cannot read user B's entries, even if the front-end code tries.
Path A: take my build
You are coaching me through Project 07 of the AI Building Course, "Dear Diary" - a private
diary app with real user accounts and a hosted database, where one user can never read
another's entries. I am a beginner. Explain things as you go, in plain English, and don't
assume I know a term just because you used it a moment ago.

This project uses Supabase (a hosted database). It needs two values - a Project URL and an
"anon" key - but these are PUBLIC by design and I paste them in myself; you will not create
my Supabase account for me or touch the separate SECRET key. We are working in the folder I
have open right now. Here is the whole job.

STEP 1 - GET THE PROJECT FILES

Fetch the folder `07-Private-Notes-App` from this PUBLIC GitHub repository:

    https://github.com/seanmccloskey10-cell/ai-building-course

Put its CONTENTS directly into my current folder - so I end up with index.html, styles.css,
app.js, Supabase-Configuration.js, supabase-setup.sql, package.json, package-lock.json,
README.md, PROMPTS.md, STUDENT-PROMPT.md and .gitignore sitting right here. I should NOT end
up with a nested folder. Make sure the dotfiles come across.

Use whichever method works on my machine:
  - If `git` is available: clone shallowly into a temp subfolder, move the contents of
    `07-Private-Notes-App` up (including the dotfiles), then delete the temp subfolder
    (including its .git).
  - If `git` is missing: download and extract the tarball with curl/tar.
        https://github.com/seanmccloskey10-cell/ai-building-course/archive/refs/heads/main.tar.gz
  - If both fail, tell me exactly what failed. Do not hand-write the app from memory.

If my folder already has these files, don't re-download. If a Supabase-Configuration.js with
real values already exists, NEVER overwrite it. Then read the README.md.

STEP 2 - CHECK MY SETUP

Check Node.js is version 20 or newer (`node --version`). If missing/old, tell me to install
LTS from nodejs.org and fully quit+reopen VS Code / Claude Code (a new tab isn't enough).
On Windows, if npm/npx fails with "npm.ps1 cannot be loaded because running scripts is
disabled", tell me to use `cmd` or run `Set-ExecutionPolicy -Scope CurrentUser RemoteSigned`.

STEP 3 - THE CONCEPT (this is what Project 07 is really about)

Explain the two ideas in plain English:
  - SUPABASE is a hosted backend: it creates accounts, checks passwords, remembers who's
    logged in, and stores data - so my code just calls simple functions. The Project URL is
    the address; the anon key is my public "guest pass".
  - ROW LEVEL SECURITY (RLS) is the guard. My entries live in a table, and RLS is a rule,
    enforced by Supabase's servers, that only ever returns rows belonging to whoever's
    asking. This is why the anon key can be public: the guard - not the secrecy of the key -
    is what keeps my diary private. Even someone reading all my JavaScript can't bypass a
    guard that isn't in my code. Contrast this with Project 01, where the key HAD to stay
    secret - opposite halves of one idea.

STEP 4 - SET UP SUPABASE (I do the dashboard parts myself)

Walk me through, but let me do the clicking - do NOT create my account or paste my values
for me:
  - Create a free project at supabase.com (any name; set a database password; pick a nearby
    region) and wait ~2 min for it to finish.
  - Get my two values: Project URL (Project Settings -> Data API) and the anon/publishable
    key (Project Settings -> API Keys). Both are safe to be public. Tell me NOT to use the
    separate secret key anywhere.
  - Have me paste both into Supabase-Configuration.js (replacing the PASTE_YOUR_... lines)
    and save.
  - Recommend I turn OFF email confirmation while testing: Authentication -> Providers ->
    Email, switch "Confirm email" off. This lets me sign up and log straight in, which the
    two-account privacy test in STEP 6 needs. If the toggle isn't where you expect (Supabase
    moves it), tell me plainly - we'll find it, or just click the confirmation emails instead.
  - Have me open Supabase's SQL Editor -> New query, paste in the whole of
    supabase-setup.sql, and click Run. Explain what it does: creates the `entries` table,
    turns ON Row Level Security, and installs the "only your own rows" policy. Supabase's UI
    changes often - if a menu name doesn't match, help me find the right screen rather than
    insisting on exact wording.

STEP 5 - RUN IT

Have me run `npm install` (warn it's noisy; the vulnerability warnings are harmless; do NOT
run `npm audit fix --force`), then `npx netlify dev`. Skip any Netlify login. Reassure me
that "No app server detected / unable to determine public folder" is normal. Tell me to open
http://localhost:8888, sign up with an email and a 6+ character password, and write an entry.
If I see a "One step first" message, my Supabase-Configuration.js still has placeholders -
help me fix that. If login says "Email not confirmed", explain I can click the emailed link
or turn email confirmation off under Authentication -> Providers -> Email. Port busy ->
`npx netlify dev --port 8899`.

STEP 6 - PROVE THE PRIVACY WORKS (the payoff)

Walk me through the two-account test from the README: sign up as User A (using a
name+a@gmail.com alias), add entries, log out; sign up as User B (name+b@gmail.com) and
confirm the list is EMPTY; log back in as User A and confirm my entries are still there.
Then make the point explicitly: there is no "where user_id" filter anywhere in app.js - the
database refused to hand over the other user's rows all by itself. That's RLS.

HOW I WANT YOU TO WORK

Go one step at a time and check in with me between steps - this project has dashboard work
and a database step, not just code. Keep explanations short. When you run a command, say
what it does before you run it. Don't create my Supabase account or run the SQL for me, and
never use or ask me for the secret key. If something doesn't match what this prompt
describes, tell me plainly instead of improvising around it.
Path B: build your own
I want to build my own private diary app from scratch on Supabase, with
real sign-in and entries only I can read. Coach me through it, but let me
do the thinking. The rough roadmap - we fill in the details together:

1. A free Supabase project, and a table for entries (id, user, date, text).
2. Sign-in with magic links (email me a link, no passwords to store).
3. Write entries, read my entries, delete one.
4. THE PART THAT MATTERS: row-level security. You're probably going to
   need RLS - what is RLS? It's row-level security: rules that live IN the
   database saying "a user can only see rows where user_id = their own id".
   Explain why the front end filtering my entries is NOT security, then
   help me write the actual policies.

Things I know are coming - warn me at the right moment instead of letting
me hit them cold:
  - Supabase has two kinds of keys. The anon/publishable key is designed
    to be visible in the browser - RLS is what actually protects the data.
    The service/secret key must NEVER appear in front-end code, ever.
  - RLS isn't proven until it's tested with TWO accounts. We create a
    second user and genuinely try to read my entries with it. If we can,
    we failed - fix before continuing.
  - Turning RLS on with no policies locks everyone out - expect one
    confusing "why is everything empty" moment; it means it's working.

Go piece by piece and make me predict what should happen before we run
anything. If I'm stuck after two honest attempts, show me the fix.

If we get truly stuck, the finished version lives at
https://github.com/seanmccloskey10-cell/ai-building-course (project 07) -
for comparing at the end, not copying during.
Million Dollar Idea App
A mobile app, without the app store- What makes a website installable: manifest, icons, service worker
- Offline: why the app still opens with no signal
- The difference between a PWA and an app-store app
- Why icons and HTTPS are non-negotiable
You build an idea-capture notepad and make it installable on your phone: icon on the home screen, opens full-screen, works offline. Same web code you've written all course, plus three special files, and suddenly it behaves like an app. That trick is called a PWA.
Path A: take my build
You are coaching me through Project 08 of the AI Building Course, the "Million Dollar Idea
App" - a notes app I can INSTALL on my phone like a real app (a PWA). I am a beginner. I
may not know what a terminal, a package, or a service worker is. Explain things as you go,
in plain English, and don't assume I know a term just because you used it a moment ago.

This project has NO API key and NO account - nothing to sign up for. We are working in the
folder I have open right now. Here is the whole job.

STEP 1 - GET THE PROJECT FILES

Fetch the folder `08-Personal-Notepad` from this PUBLIC GitHub repository:

    https://github.com/seanmccloskey10-cell/ai-building-course

Put its CONTENTS directly into my current folder - so I end up with index.html, main.js,
style.css, manifest.webmanifest, service-worker.js, an icons/ folder, package.json,
package-lock.json, README.md, PROMPTS.md, STUDENT-PROMPT.md and .gitignore sitting right
here. I should NOT end up with a nested folder.

Use whichever method works on my machine:
  - If `git` is available: clone shallowly into a temp subfolder, move the contents of
    `08-Personal-Notepad` up (including the icons/ folder and the dotfiles), then delete
    the temp subfolder (including its .git).
  - If `git` is missing: download and extract the tarball with curl/tar.
        https://github.com/seanmccloskey10-cell/ai-building-course/archive/refs/heads/main.tar.gz
  - If both fail, tell me exactly what failed. Do not hand-write the app from memory.

If my folder already has these files, don't re-download. Then read the README.md.

STEP 2 - CHECK MY SETUP

Check Node.js is version 20 or newer (`node --version`). If missing/old, tell me to install
LTS from nodejs.org and fully quit+reopen VS Code / Claude Code (a new tab isn't enough).
On Windows, if npm/npx fails with "npm.ps1 cannot be loaded because running scripts is
disabled", tell me to use `cmd` or run `Set-ExecutionPolicy -Scope CurrentUser RemoteSigned`.

STEP 3 - THE CONCEPT (this is what Project 08 is really about)

Explain in plain English what makes this a PWA - an installable app - rather than just a
website. Point at the three pieces in the files I downloaded:
  - manifest.webmanifest: the app's name, colours and icons - what lets it appear on a home
    screen properly.
  - service-worker.js: background code that caches the app's files so it OPENS OFFLINE.
  - icons/: the pictures shown on the home screen.
Tell me the big idea: a PWA is the same web code I already know, plus these three
declarations, and it's the cheapest way to get a real installable app without app stores or
learning Swift/Kotlin. Keep it short.

Also mention one thing in main.js: my note text is shown with textContent, not innerHTML,
on purpose - so a note that looks like code is shown as plain text and never runs. That's a
basic security habit worth noticing.

STEP 4 - RUN IT

Run `npm install` (warn it's noisy; the vulnerability warnings are harmless; do NOT run
`npm audit fix --force`). Then `npx netlify dev`. Skip any Netlify login. Reassure me that
"No app server detected / simple static server / unable to determine public folder" is
normal. Warn about first-run timing (ready a few seconds early; wait 30s and refresh if
blank). Tell me to open http://localhost:8888, write a note, and refresh to see it persist.
Port busy → `npx netlify dev --port 8899`.

STEP 5 - INSTALL IT (the fun part)

Coach me through installing it, per the README:
  - On my computer: in Chrome/Edge at localhost:8888, look for an install icon in the
    address bar (or the browser menu's "Install…" option). Installing from localhost works
    because browsers trust localhost.
  - Explain that to install on my actual PHONE I'd first need it on the real internet -
    which I learned to do in Project 03 (deploy to Netlify), then "Add to Home Screen".
    You do NOT need to deploy it for me or touch any account - just explain the path.
  - To prove it's really a PWA: install it, turn off wifi, open it again - it still works,
    because the service worker cached it.
  - Heads up for later edits: because the service worker caches files, if I change the code
    and don't see the change, I need to hard-refresh (Ctrl+Shift+R) or unregister the
    service worker in DevTools -> Application. Tell me this so it doesn't confuse me.

Then point me at PROMPTS.md for ways to make it mine.

HOW I WANT YOU TO WORK

Go one step at a time and check in with me between steps. Keep explanations short. When
you run a command, say what it does before you run it. Don't deploy on my behalf or touch
any account. If something doesn't match what this prompt describes, tell me plainly instead
of improvising around it.
Path B: build your own
I want to build my own idea-notepad from scratch and make it installable
on my phone like a real app - a PWA. Coach me through it, but let me do
the thinking. The rough roadmap - we fill in the details together:

1. A dead-simple notepad: type an idea, it's saved (localStorage - I know
   it from Project 05), see the list, delete one.
2. THE PART THAT MATTERS: making it installable. Three ingredients - a
   manifest file (name, colours, icons), real icons (192px and 512px),
   and a service worker that caches the files so it opens offline.
   Explain each one's job before we write it.
3. Test the install on my actual phone, not just the laptop.

Things I know are coming - warn me at the right moment instead of letting
me hit them cold:
  - Install only works over HTTPS or localhost - browsers refuse
    otherwise. To test on the phone we'll need it served properly.
  - The icons must be REAL, decodable PNGs at the declared sizes. Broken
    icons fail silently: everything looks right and the install prompt
    just never appears.
  - Service workers cache HARD. When my changes stop showing up, it's the
    cache doing its job - teach me the update/versioning move rather than
    letting me think the app's broken.
  - If I render saved notes into the page as HTML, someone's note can
    RUN as code. Use textContent, and make me understand why.

Go piece by piece and make me predict what should happen before we run
anything. If I'm stuck after two honest attempts, show me the fix.

If we get truly stuck, the finished version lives at
https://github.com/seanmccloskey10-cell/ai-building-course (project 08) -
for comparing at the end, not copying during.
Stock Explorer
Your own Bloomberg terminal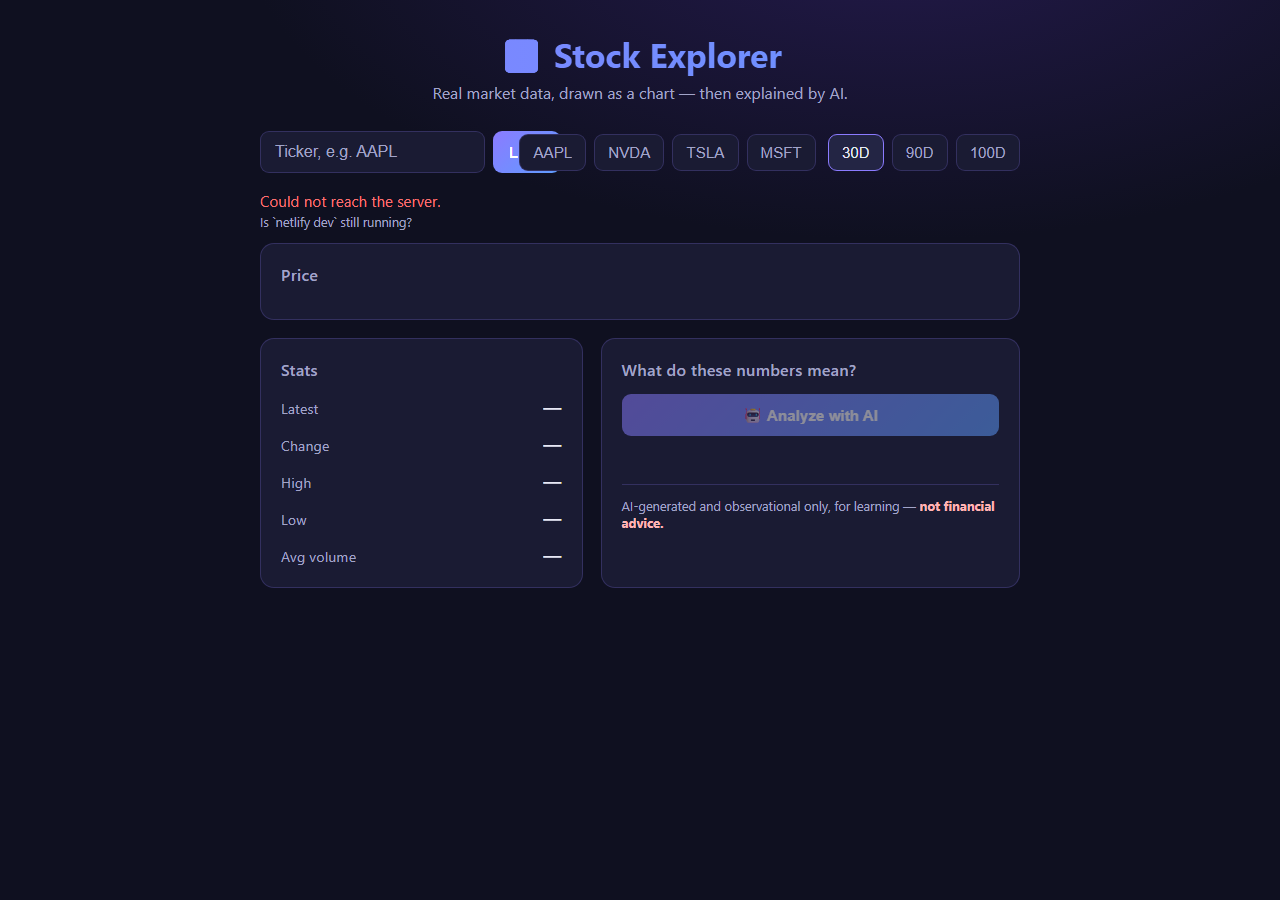
- Drawing real data with a charting library
- A free-tier API key and living within its limits
- Data-to-story: turning numbers into an AI-written narrative
- Two keys, both server-side - the Project 01 pattern, doubled
You build a stock explorer: type a ticker, see the price history charted, then Claude writes a plain-English story of what the numbers show. Two APIs, two keys, both hidden server-side. The data-to-story move is the most professionally useful trick in the course.
Path A: take my build
You are coaching me through Project 09 of the AI Building Course, "Stock Explorer" - a page that
draws a real stock's price as a chart and then has AI describe what the numbers mean. I am a
beginner. Explain things as you go, in plain English, and don't assume I know a term just
because you used it a moment ago.

This project uses TWO keys (Alpha Vantage for stock data, Anthropic for the AI), but I will get
and fill in my own - you will not use or ask for a real key. Both keys live in server-side
functions, never in the browser. We are working in the folder I have open right now.

STEP 1 - GET THE PROJECT FILES

Fetch the folder `09-Stock-Explorer` from this PUBLIC GitHub repository:

    https://github.com/seanmccloskey10-cell/ai-building-course

Put its CONTENTS directly into my current folder - so I end up with index.html, styles.css,
app.js, a netlify/functions/ folder containing prices.js and analyze.js, netlify.toml,
package.json, package-lock.json, .env.example, .gitignore, README.md, PROMPTS.md and
STUDENT-PROMPT.md. I should NOT end up with a nested folder. Make sure the netlify/ folder and
the dotfiles come across.

Use whichever method works on my machine:
  - If `git` is available: clone shallowly into a temp subfolder, move the contents of
    `09-Stock-Explorer` up (including netlify/ and the dotfiles), then delete the temp subfolder
    (including its .git).
  - If `git` is missing: download and extract the tarball with curl/tar.
        https://github.com/seanmccloskey10-cell/ai-building-course/archive/refs/heads/main.tar.gz
  - If both fail, tell me exactly what failed. Do not hand-write the app from memory.

If my folder already has these files, don't re-download. If a .env already exists, NEVER
overwrite it. Then read the README.md.

STEP 2 - CHECK MY SETUP

Check Node.js is version 20 or newer (`node --version`). If missing/old, tell me to install LTS
from nodejs.org and fully quit+reopen VS Code / Claude Code (a new tab isn't enough). On Windows,
if npm/npx fails with "npm.ps1 cannot be loaded because running scripts is disabled", tell me to
use `cmd` or run `Set-ExecutionPolicy -Scope CurrentUser RemoteSigned`.

STEP 3 - THE CONCEPT (what Project 09 is really about)

Explain two ideas in plain English:
  - DRAWING DATA: a line chart is just numbers turned into positions - each day's closing price
    becomes a point (x = when, y = how much), connected by a line. The chart in app.js is drawn
    by hand with SVG, no chart library, so I can see there's no magic.
  - DATA-TO-STORY: the "Analyze" button sends the numbers to Claude and asks it to describe them
    in words - the same AI call as Project 10, pointed at data instead of news. It's observational
    only (no advice), with a "not financial advice" note shown.
Then point out that BOTH keys sit in server-side functions (netlify/functions/prices.js and
analyze.js), never in the browser - the Project 01 lesson, now with two keys.

STEP 4 - THE TWO KEYS (I fill these in myself)

Explain I need two free keys and walk me through getting them - but do NOT use or ask me to
paste a real key to you:
  - Alpha Vantage (free stock data) at https://www.alphavantage.co/support/#api-key - no card,
    ~25 lookups/day on the free tier.
  - Anthropic at https://console.anthropic.com (API keys) - the same key from Projects 01 and 10;
    needs a little credit under Billing.
Have me run `npm install`, then copy .env.example to .env and put both keys in it.

STEP 5 - RUN IT

Have me run `npx netlify dev` (warn npm install is noisy; the vulnerability warnings are harmless;
do NOT run `npm audit fix --force`). Skip any Netlify login. Tell me to open http://localhost:8888
- it loads AAPL to start. Have me try a ticker, switch the time range, and press "Analyze with AI"
to see Claude describe the chart. If I see a "No ... key found" message, my .env isn't set up yet -
help me fix it. Port busy -> `npx netlify dev --port 8899`.

HOW I WANT YOU TO WORK

Go one step at a time and check in with me between steps. Keep explanations short. When you run a
command, say what it does before you run it. When you draw the chart, walk me through how a price
becomes a point on the screen - that's the lesson. Never use or ask me to paste a real key, and
never deploy or push to GitHub on my behalf. If something doesn't match what this prompt describes,
tell me plainly instead of improvising around it.
Path B: build your own
I want to build my own stock explorer from scratch: type a ticker, see a
price chart, and have an AI narrate what the numbers show. Coach me
through it, but let me do the thinking. The rough roadmap - we fill in
the details together:

1. A free Alpha Vantage API key for market data (free tier: about 25
   requests a DAY - we design around that from the start).
2. Fetch a ticker's daily prices and draw them with Chart.js.
3. THE PART THAT MATTERS, twice over: BOTH keys stay server-side. Alpha
   Vantage calls and Anthropic calls each go through their own little
   server function (the Project 01 pattern) - nothing sensitive in the
   browser.
4. Data-to-story: compute a few simple stats (change, high, low, trend),
   send THOSE to Claude, and show the narrative it writes under the chart.

Things I know are coming - warn me at the right moment instead of letting
me hit them cold:
  - 25 requests a day disappears fast while building. Cache the last
    response and re-use it instead of re-fetching on every tweak.
  - Send Claude the computed stats, not the raw price dump - make me
    reason about why before we wire it.
  - The narrative must read as description, not financial advice - keep
    the prompt honest about that.
  - Invalid tickers and rate-limit responses need real messages, not a
    blank chart.

Go piece by piece and make me predict what should happen before we run
anything. If I'm stuck after two honest attempts, show me the fix.

If we get truly stuck, the finished version lives at
https://github.com/seanmccloskey10-cell/ai-building-course (project 09) -
for comparing at the end, not copying during.
Daily AI Digest
Email automation- Code that runs on a schedule, on a computer that isn't yours
- GitHub Actions: what a workflow file actually says
- Repository secrets: keys for a machine you never touch
- Making failures loud - a green run that did nothing is the trap
You build a robot that reads the news, has Claude summarise it, and emails you a digest every morning via Resend, running on GitHub's servers whether your laptop is on or not. The difference between a script you run and a system that runs itself.
Path A: take my build
You are coaching me through Project 10 of the AI Building Course, a Daily AI Digest - a
script that reads the news, has AI pick and summarize the top stories, and emails me a
digest on a schedule. I am a beginner. This is the most involved project in the course, so
explain things as you go, in plain English, and don't assume I know a term just because you
used it a moment ago.

This project uses TWO keys (one for the AI, one for email) but I will get and fill in my
own - you will not use or ask for a real key. We are working in the folder I have open right
now. Here is the whole job.

STEP 1 - GET THE PROJECT FILES

Fetch the folder `10-Daily-Digest` from this PUBLIC GitHub repository:

    https://github.com/seanmccloskey10-cell/ai-building-course

Put its CONTENTS directly into my current folder - so I end up with digest.js,
package.json, package-lock.json, .env.example, .gitignore, a .github/workflows/ folder with
daily-digest.yml inside it, README.md, PROMPTS.md and STUDENT-PROMPT.md. I should NOT end up
with a nested folder. Make sure the hidden .github folder and the dotfiles come across.

Use whichever method works on my machine:
  - If `git` is available: clone shallowly into a temp subfolder, move the contents of
    `10-Daily-Digest` up (including .github/ and the dotfiles), then delete the temp
    subfolder (including its .git).
  - If `git` is missing: download and extract the tarball with curl/tar.
        https://github.com/seanmccloskey10-cell/ai-building-course/archive/refs/heads/main.tar.gz
  - If both fail, tell me exactly what failed. Do not hand-write the app from memory.

If my folder already has these files, don't re-download. If a .env already exists, NEVER
overwrite it. Then read the README.md.

STEP 2 - CHECK MY SETUP

Check Node.js is version 20 or newer (`node --version`). If missing/old, tell me to install
LTS from nodejs.org and fully quit+reopen VS Code / Claude Code (a new tab isn't enough).
On Windows, if npm/npx fails with "npm.ps1 cannot be loaded because running scripts is
disabled", tell me to use `cmd` or run `Set-ExecutionPolicy -Scope CurrentUser RemoteSigned`.

STEP 3 - THE CONCEPT (this is what Project 10 is really about)

Explain the two new ideas in plain English:
  - AUTOMATION: every project so far ran when I clicked something. This one runs on a
    SCHEDULE, on GitHub's computers, without me and without my laptop being on. The file
    .github/workflows/daily-digest.yml is the instructions GitHub follows on a timer. That's
    the whole point of the project.
  - The Resend email API: my code can't just send email on its own; it goes through a
    service (Resend) that mail providers trust - like Project 06 went through Stripe for
    payments.
Then describe the pipeline in digest.js: fetch RSS news -> Claude picks the top 3 -> Claude
summarizes each -> build an HTML email -> send it with Resend. Keep it short.

STEP 4 - THE TWO KEYS (I fill these in myself)

Explain that I need two free keys, and walk me through getting them - but do NOT use or ask
me to paste a real key to you; I put them in my own .env file:
  - An Anthropic key from https://console.anthropic.com (API keys). Needs a few $ of credit
    under Billing. Note a Claude.ai subscription is NOT API credit.
  - A Resend key from https://resend.com (API Keys). Free tier, no card.
Have me run `npm install`, then copy .env.example to .env. Tell me to leave SEND_EMAIL=false
for now and just fill in ANTHROPIC_API_KEY - that lets me run the whole thing safely without
emailing anything.

STEP 5 - RUN IT

Have me run:

    node digest.js

Walk me through the output: it fetches articles, Claude picks the top 3, summarizes them,
and writes index.html and email.html into the folder. Tell me to open index.html to see my
digest. No email is sent because SEND_EMAIL is false - reassure me that's intended.

Then, when I'm ready to actually email myself: set RESEND_API_KEY, set EMAIL_TO to my own
email, set SEND_EMAIL=true, and run again. Warn me that on Resend's free tier I can only
email the address I signed up with - which is fine, I'm emailing myself.

STEP 6 - TURN ON THE AUTOMATION

Explain (don't do it for me - it's my repo and my secrets):
  - Put the project in my own GitHub repo.
  - Add ANTHROPIC_API_KEY, RESEND_API_KEY and EMAIL_TO as repository secrets under
    Settings -> Secrets and variables -> Actions.
  - Uncomment the two `schedule` lines in .github/workflows/daily-digest.yml and push.
Then GitHub runs my digest every morning for free, with my laptop off. Explain why the
schedule ships commented-out (so it can't run before my secrets exist).

HOW I WANT YOU TO WORK

Go one step at a time and check in with me between steps - this project has a lot of parts.
Keep explanations short. When you run a command, say what it does before you run it. Never
use or ask me to paste a real key to you, and never turn on the schedule or push to GitHub
on my behalf. If something doesn't match what this prompt describes, tell me plainly.
Path B: build your own
I want to build my own daily AI digest from scratch: a script that
gathers a few articles, has Claude summarise them, and emails me the
result every morning - automatically, on GitHub's servers, not my laptop.
Coach me through it, but let me do the thinking. The rough roadmap:

1. A Node script, run by hand first: fetch 3-5 items from an RSS feed,
   send them to Claude for a short summary, print it.
2. Email the summary to myself with Resend (free tier, needs its own key).
3. THE PART THAT MATTERS: the schedule. A GitHub Actions workflow runs
   the script every morning on GitHub's computers. Explain what each line
   of the workflow file means - it's short, and it's the whole lesson.
4. Keys go in the repo's Settings -> Secrets, never in code - that's how
   a machine I'll never touch gets to use my keys safely.

Things I know are coming - warn me at the right moment instead of letting
me hit them cold:
  - This project has TWO keys (Anthropic + Resend) and they live in three
    places while building: my local .env, and each as a repository secret.
    Keep me honest about which is which.
  - Keep the schedule OFF (commented out) until the script works by hand
    and via a manual workflow run - then switch it on deliberately.
  - The nastiest bug in scheduled work: a run that goes GREEN while
    sending nothing. Make the script fail LOUDLY if the email didn't
    actually send - I'd rather see red than trust a lie.
  - Scheduled times are UTC, not my timezone.

Go piece by piece and make me predict what should happen before we run
anything. If I'm stuck after two honest attempts, show me the fix.

If we get truly stuck, the finished version lives at
https://github.com/seanmccloskey10-cell/ai-building-course (project 10) -
for comparing at the end, not copying during.
Command Center
The capstone · your command centreThe Command Center: everything the ten projects taught, in one build.
- No walkthrough this time - just a brief, like real work
- Combining APIs, localStorage and real UI in one product
- Scoping: deciding what NOT to build
- Proving to yourself the ten lessons stuck
One brief, no answer key: build a personal command centre that pulls together live data, saved state and a real interface. You've done every piece somewhere in the last ten projects; the capstone is discovering you can now do them all at once, unassisted.
The brief
You are coaching me through Project 11 of the AI Building Course - the CAPSTONE, called
"Command Center." I have finished the other ten projects. This one is different: there is NO
finished app to download and NO step-by-step prompt list. There is a brief, and we build it
together from scratch. I am the architect; you are my builder. Do not just generate the whole
app in one go - build it with me, a module at a time, so I understand what I'm shipping.

STEP 1 - GET THE BRIEF

Fetch the folder `11-Command-Center` from this PUBLIC GitHub repository:

    https://github.com/seanmccloskey10-cell/ai-building-course

Put its CONTENTS directly into my current folder - I should end up with README.md,
STUDENT-PROMPT.md, .env.example and .gitignore, no nested folder. There is deliberately NO
application code in there - just the brief and the setup files. Use git (shallow clone into a
temp subfolder, move the contents up including dotfiles, delete the temp) or the tarball
fallback:
    https://github.com/seanmccloskey10-cell/ai-building-course/archive/refs/heads/main.tar.gz
If both fail, tell me exactly what failed. Then READ README.md carefully - that is the brief,
and it is the source of truth for what we're building. Do not skim it.

STEP 2 - CHECK MY SETUP AND MAKE A PLAN

Check Node.js is version 20 or newer (`node --version`); if missing/old, tell me to install
LTS from nodejs.org and fully quit+reopen VS Code / Claude Code. On Windows, if npm/npx fails
with the "npm.ps1 cannot be loaded" error, tell me to use `cmd` or run
`Set-ExecutionPolicy -Scope CurrentUser RemoteSigned`.

Then, BEFORE writing any code, propose a plan: the six modules from the brief in the order
we'll build them (empty layout -> Mission Planner drag-and-drop board -> habits -> market
data -> AI console -> daily motivation -> polish), and a recommended stack. Tell me plainly
that plain HTML + JavaScript can do all of this (same tools as Projects 04, 05, 08), and that
React with Vite is a reasonable step up for an app this size - lay out the trade-off in one
or two lines and let ME choose. Wait for my choice before scaffolding.

STEP 3 - BUILD IT WITH ME, MODULE BY MODULE

Follow the brief. For each module, tell me which earlier project's concept it reuses, build
just that module, and let me try it before moving on:
  - Mission Planner is the priority and the only genuinely new mechanic (native browser
    drag-and-drop). Get it smooth: drag between three columns, add/delete tasks, reject empty
    names, and persist to localStorage so it survives a refresh (the Project 05 habit).
  - Daily Protocols: reuse the habit-streak logic from Project 05 - complete once per day,
    streak grows, resets on a missed day, persisted.
  - Asset Monitor: live crypto from CoinGecko's free public API (the Project 04 pattern, no
    key). Stocks (Alpha Vantage, free key) are OPTIONAL - offer them but don't block on them.
    Always show a friendly "offline" message on a network error, never a blank box.
  - Command Console + Intel Feed: these call the AI with my Anthropic key, but note this runs
    in the BROWSER - unlike Project 10, which was a Node script, so its exact code won't just
    work here. The clean, safe way is the Project 01 pattern: a tiny serverless function (run
    with `netlify dev`) that holds my key in a server-side .env and makes the Anthropic call,
    so my dashboard calls MY function - no key in browser code, no CORS. If we instead call
    Anthropic straight from browser JS, tell me it needs the
    `anthropic-dangerous-direct-browser-access` header (or the SDK's `dangerouslyAllowBrowser`)
    and that my key is then public, so local-only. Recommend the function approach.
  - Daily Transmission: a quote that's stable for the whole day and changes tomorrow - simple
    date logic, no key.
Save polish (the dark mission-control look, glowing glass panels, colour-coded columns) for
LAST, once everything works.

STEP 4 - KEYS, SAFELY

I need my own Anthropic key for the AI modules. Have me copy .env.example to .env and put my
key there; NEVER use, invent, or ask me to paste a real key to you. Crypto needs no key.

Make sure I understand the key handling - be precise, because a plain static page can't read
a .env at all, and getting this wrong is exactly the Project 01 mistake:
  - Recommended: hold the key in a server-side .env and call Anthropic from a small serverless
    function (Project 01 pattern, run with `netlify dev`). The key never reaches browser code -
    safe, and it's the pattern I already learned.
  - Shortcut (local only): call Anthropic from the browser with the
    `anthropic-dangerous-direct-browser-access` header - but then my key is public, so it's
    only OK because I'm the sole user on my own machine.
Either way, the key stays in .env (gitignored) and is NEVER hardcoded into a .js/.html file.
Remind me that putting this on the real internet would force the server-function pattern.

STEP 5 - SYSTEMS CHECK

When it's built, walk me through the "What done looks like" checklist in the brief - drag and
drop, persistence on refresh, market data loading, the AI answering, habits, and the look.

HOW I WANT YOU TO WORK

I'm the architect - offer options and let me decide the product calls; don't railroad me into
one design. Build a module at a time and check in between. Keep explanations short. When you
run a command, say what it does first. Never use or ask me for a real key, and never deploy
or push to GitHub on my behalf. If I ask for the "whole thing at once," gently push back and
build it in pieces so I actually learn it. This is my graduation - make me do the driving.
The whole course lives at github.com/seanmccloskey10-cell/ai-building-course → Or browse the resource library →
Do it with someone. Everything here is free and you can run it alone. If you would rather work through it with me, one to one, book a free 30-minute chat. No pitch.